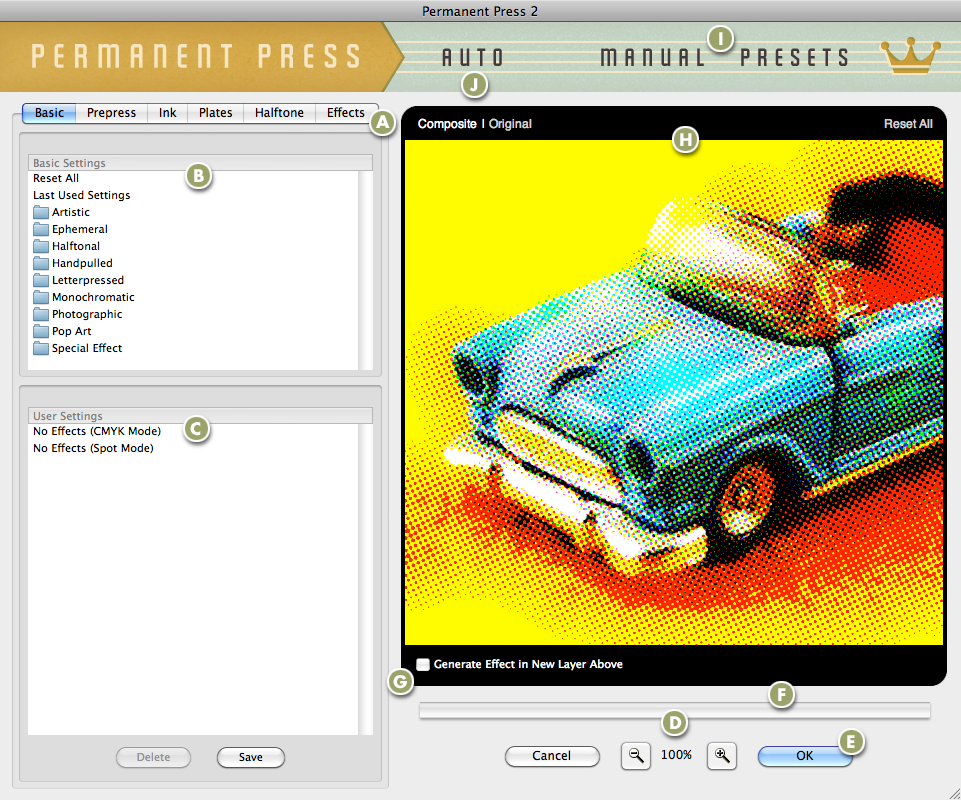
Permanent Press 2 features six different tabbed sections in its fully scalable GUI interface to create and fine tune the plug-in effects. This page provides a brief overview of the basic user interface elements. For a more detailed look at the entire GUI interface and each tabbed section, Click Here to look through the product manual.

All Permanent Press 2 filter controls are grouped on tabs according to their function. Click on a tab name to switch to that related subset of controls.
The Basic Settings dialog ships with over 200 amazing settings that show the range of the filters effects.
The User Settings dialog allows you to create and save or apply previously used settings to the image you're working with.
Click the magnifying glass icons to Zoom in or Zoom out respective to its icon. The current level of magnification is shown between these icons.
Once you're satisfied with the Permanent Press 2 effect you've created, click the OK button to apply the Permanent Press 2 effect to your image. Clicking the Cancel button closes the filter window without applying the effect.
The rectangle just below the Preview Window is the Render Status bar. As an effect is being rendered in the preview, this rectangle displays the amount of rendering that has been completed.
Generate Permanent Press 2 effects in a new layer leaving your original untouched. Layer features are only supported in Adobe Photoshop and compatibles that support layers functions.
As you work with the filter controls, you can preview the effect on your image here. As you expand the plug-in window, the preview windows expands to fill the space with a larger preview.
If you want to check for the latest version of the software, access tutorials or get help, simply click the appropriate button to launch your preferred section.
Click the Auto button to randomly load and apply a variety of effects to your image with stunning results.