Let's Learn About Retrographer
Effects Settings
We knew you'd want to enhance your images with even more authentic vintage photography special effects, so we created a section just for them. Simply click the Effects tab along the top of the UI to access this section.
|
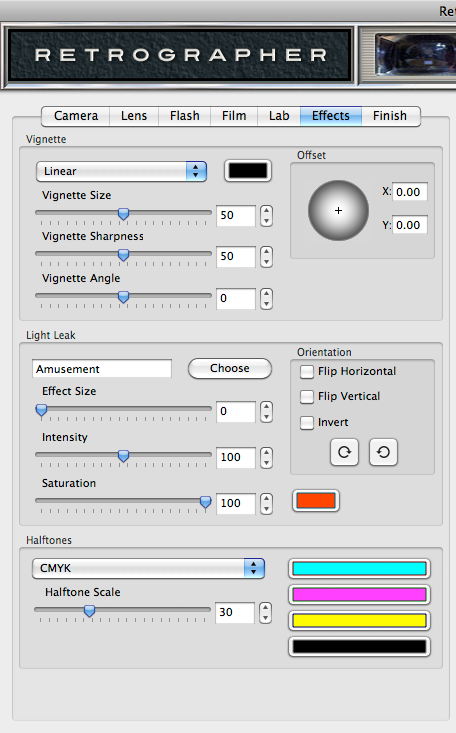
Add a Vignette to Your Image
- Vignette Shape - Simply click the dropdown box to select the shape of the vignette you'd like to apply to you image or select None to remove the vignette effect. All other vignette controls will remain disabled until a vignette shape has been selected.
- Vignette Color - Click the color swatch button to the right of the Vignette Shape dropdown menu to launch the color picker and choose the ideal vignette color
- Vignette Size - Using the slider control, you may enlarge or reduce the size of the vignette or simply enter a number in the text entry field to the right.
- Vignette Sharpness - Increase or decrease the edge sharpness of the vignette by moving the slider control or by simply entering a number in the text entry field to the right.
- Vignette Angle - By default, the vignette angle is set at zero but can be easily rotated incrementally up to 180 degrees in either direction. As the slider control is adjusted, the vignette will rotate accordingly.
- Vignette Offset - To modify the position of the vignette on your image, click and drag the + icon on the shaded sphere. For more precise control, you may also adjust the numbers in the X and Y coordinate boxes respectively.
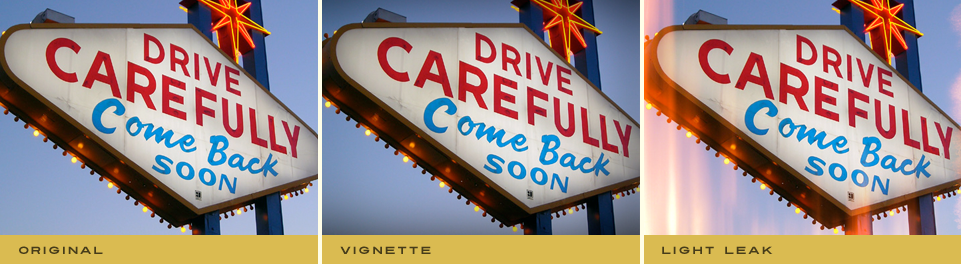
Add a Light Leak to Your Image
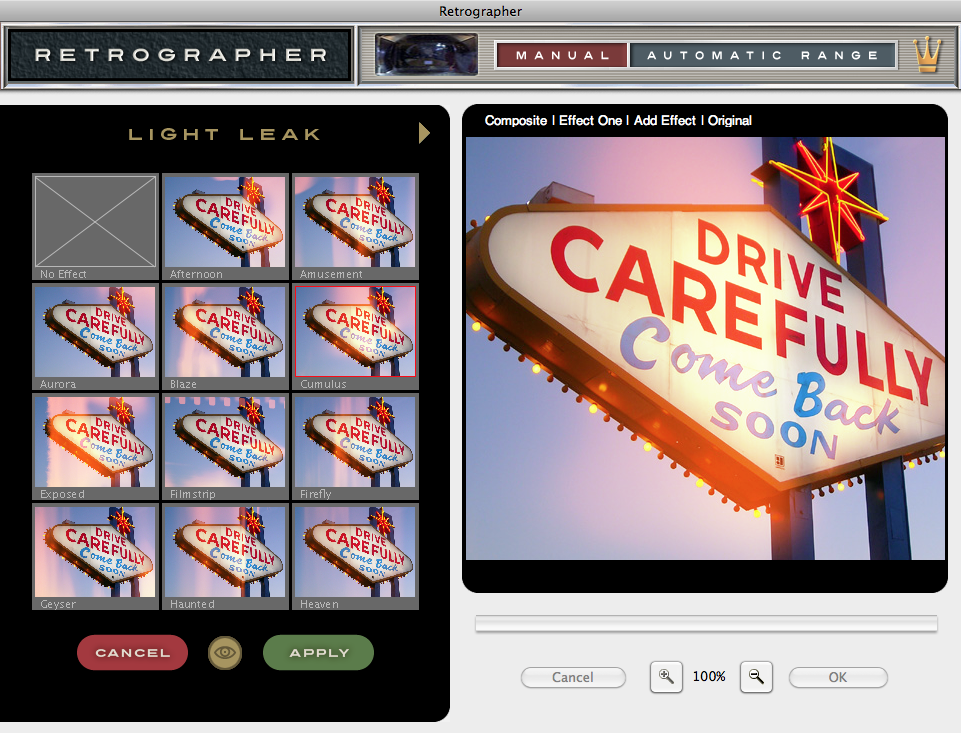
- Choose Your Light Leak - Simply click the Choose button to launch the Light Leak Effect Picker. As you click on each effect, you will see it update the image in the Preview window in realtime. To see a preview of all the effects available in the Picker applied to your image, simply click the eyeball icon along the bottom. Click the arrow icons along the top of the Picker to see more options.
Once you've selected the desired light leak effect you'd like to use, Click Apply to select and apply the chosen effect or click Cancel to leave the picker dialog.
After an effect is selected, you can adjust the controls within the Light Leak dialog box to fine tune the light leak effect. Additionally, you can select a different light leak effect at any time and your current settings will be applied to the new light leak. All other light leak controls will remain disabled until a light leak has been selected. - Light Leak Size - Using the slider control, you may enlarge or reduce the size of the light leak or simply enter a number in the text entry field to the right.
- Light Leak Intensity - Increase or fade the overall light leak effect by moving the slider control or by simply entering a number in the text entry field to the right.
- Light Leak Saturation - Simply click the color swatch icon to the right of the Saturation slider to launch the color picker to select the light leak color you'd like to apply to your image. Use the Saturation slider to desaturate the light leak color to white light only.
Adjust the Light Leak Orientation
- Flip Horizontal - Click the checkbox to flip the light leak effect horizontally.
- Flip Vertical - Click the checkbox to flip the light leak effect vertically.
- Invert - Click the Invert checkbox to inverse the light leak effect.
- Rotate - Click either rotate button to rotate the light leak effect in 90 degree increments.
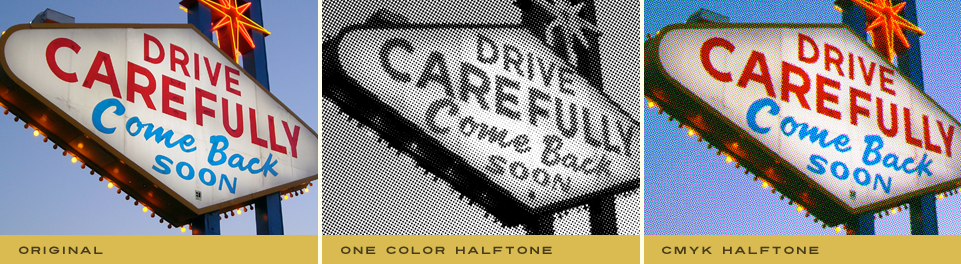
Add a Halftone Effect to Your Image
Newspapers magazines and printed ephemera all employ this original photographic reproduction method which is sure to become an absolute favorite Retrographer effect!
- Halftone Mode - Simply click the dropdown box to select the halftone mode you'd like to apply to you image or select None to remove the halftone effect. All other halftone controls will remain disabled until a halftone mode has been selected.
- Halftone Scale - Using the slider control, you may enlarge or reduce the size of the halftone dot size or simply enter a number in the text entry field to the right.
- Halftone Colors - You can change any color used in the halftone simply by clicking the appropriate color swatch to launch the color picker. Some color swatches may be disabled depending on the halftone mode selected.
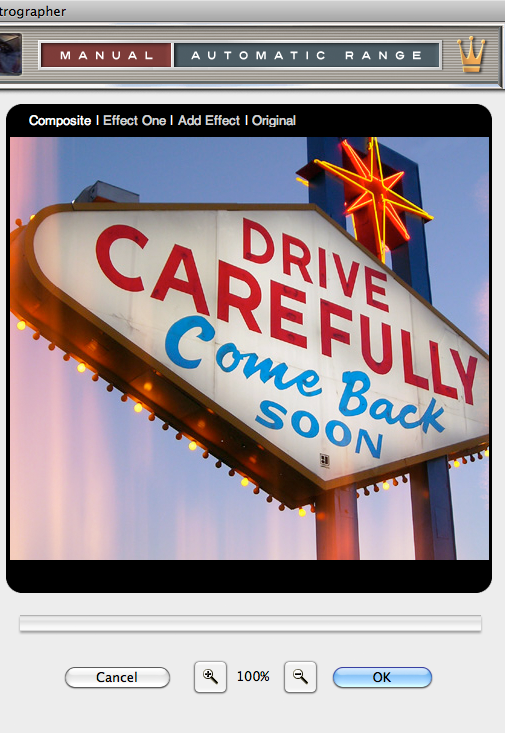
Working with the Preview Window
- Preview Options - Above the Preview window at right, you'll notice some viewing options. By default the Composite option is selected to show you what all combined tabbed section effects look like applied to the image. At any time you can click the Original option to toggle between the unaffected image and a preview of the filtered image with all effects applied or click the Lab Effects option to view just the lab effects applied to the image.
- Preview Options - Effect Multiplier - By default you are only working with a single effect layer (Effect One), by clicking the Add Effect option, you can now define an additional effect layer with its own settings (Effect Two). You can easily toggle between each effect layer by clicking Effect One or Effect Two or click Composite to view the fully composited preview with both effect layers applied in addition to all combined tabbed section effects. At any time you can delete either effect layer by clicking the red close box icon to the right of the lens name.
- Magnifying the Preview - Below the Preview window, you'll see the magnification controls. By clicking the appropriate icon (- or +), you can increase or decrease the magnification of the Preview window. The current level of magnification is shown between the magnification icons.
- Moving the Preview - When you have increased magnification and wish to view the texture effect on the rest of the image not visible in the Preview window, simply move your mouse into the Preview window and click and drag your image around to reveal the texture effected image.