

|
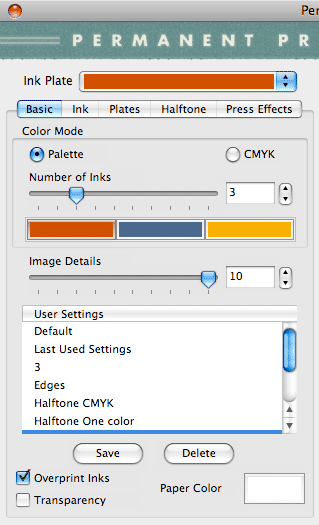
User Interface Permanent Press features five different tabbed sections of the GUI interface to create and fine tune the plug-in effects. Below we'll discuss an overview of the filter and details about each tabbed section. To start, load any image in any color mode into Photoshop and launch the Permanent Press plug-in from the following location: Filters > Mister Retro > Permanent Press.
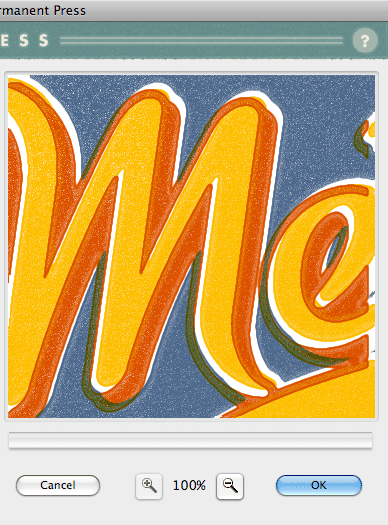
Once the plug-in GUI has been successfully registered and launched, you'll see five tabbed sections on the upper left side of the GUI and a Preview window on the right. The Preview window features zoom controls beneath and OK and Cancel buttons to apply or cancel the effect with the current settings. Since the plug-in is oriented toward creating vintage offset printing press effects, it is important to understand the relationship of the tabs to each part of the printing process and we've made it easy for you to control every aspect of these settings. Once you're satisfied with the look, click the OK button and apply the Permanent Press effect to your image. * TIP: - If you want to check for the latest version of the plug-in, textures, or presets, simply click on the Permanent Press title at the top of the GUI to launch the About dialog where you'll see the Get Updates and Tutorials buttons which link to their respective locations via a web browser where they can be easily downloaded and installed. Also, If at any time you need help with working with the Permanent Press plug-in, simply hit the F1 button to bring up help for the tabbed section of the GUI you're working with. If you would like to launch this manual at any time, simply click on the question mark icon in the upper right of the GUI. With so many controls to master, we're confident you'll be thrilled with the variety of visual effects you can create with Permanent Press Click Here to Learn about the Basic Settings . . . |