Let's Learn About Machine Wash Deluxe
Basic Settings
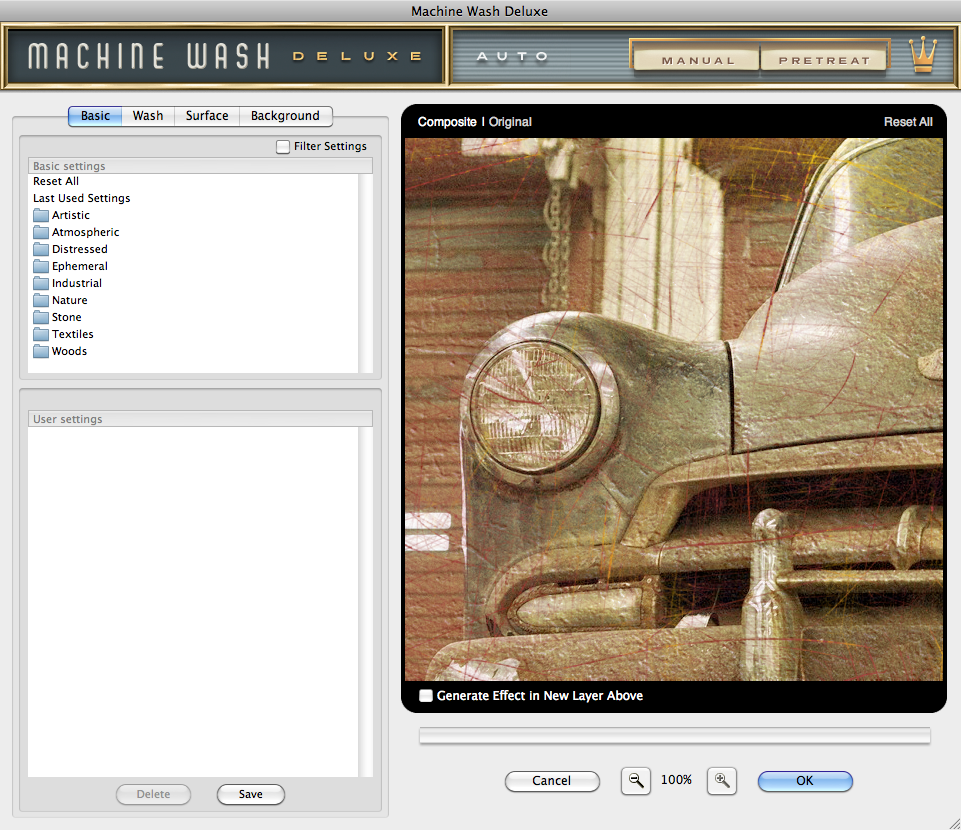
Machine Wash Deluxe always launches in the Basic tabbed section as identified by the highlighted tab in the GUI. It first performs calculations on the image and applies either the default setting or the Last Used Settings to the loaded image.
|
Basic Settings - You'll first notice on the left side of the GUI the Basic dialog which allows you to apply any of our factory default settings to your image. Select the Last Used Settings to apply the last known effect settings to the image you're working with. Use the Reset All setting to reset all tabbed sections allowing you to start from scratch. To apply any of our factory preset settings, click on any of the folders, which are organized by style to access the presets. Simply click on the setting name in the dialog box to apply the preset.
Filter Settings - If you want to filter the presets list to only display those which include default or purchased textures which can be applied after clicking the OK button, simply check the 'Filter Settings' checkbox in the upper right of the Basic Settings dialog box.
User Settings - Below the Basic Settings dialog is the User Settings dialog which allows you to save or apply previously saved settings to the image you're working with. Once you've created an effect setting you like, click the Save button, name the setting and click OK to save this setting. To recall and apply a setting, simply click on the setting name in the dialog box. To delete a setting, simply click its name in the dialog box and click the Delete button.
Working with the Preview Window
- Preview Options - Above the preview window at left, you'll notice some viewing options. By default the Composite option is selected to show you what all combined tabbed section effects look like applied to the image. At any time you can click the Original option to toggle between the unaffected image and a preview of the filtered image with all effects applied.
- Reset All - Reset All is located above the preview window on the right. When clicked, it will reset all effects globally to their default state.
- Magnifying the Preview - Below the preview window, you'll see the magnification controls. By clicking the appropriate icon (- or +), you can increase or decrease the magnification of the preview window. The current level of magnification is shown between the magnification icons.
- Moving the Preview - When you have increased magnification and wish to view the texture effect on the rest of the image not visible in the preview window, simply move your mouse into the preview window and click and drag your image around to reveal the texture effected image.
- Re-positioning the Texture Effect - To modify the position of the a texture effect on your image, hold down the Command (Apple) key (or the Ctrl key on Windows) then click and drag within the preview window to reposition the center of the effect.
- Generate Effect in New Layer Above* - Simply enable this option if you want the plug-in to duplicate your original image and apply the filtered version on a new layer above the original image leaving it intact.
* NOTE - This option is only displayed in certain versions of Adobe Photoshop and other imaging applications that support layering and automation.
Pro Tip - Adobe Photoshop users may use keyboard shortcuts to instantly change the zoom magnification. To fit the full image within the preview window, simply hold down the Command (Apple) key (or the Ctrl key on Windows) then press the number zero (0) on the keyboard. To view the image at 100% size, hold down the Command (Apple) key (or the Ctrl key on Windows) then press the number one (1) on the keyboard.